DOCS
Get started with Brian
Five steps to connect Brian to Claude. Sign up first — the live walkthrough waits for you in your Brian Settings. The visuals below are previews of what you'll see at each step.
Open the walkthrough in Brian Settings
Once you're signed in, the walkthrough below appears at /settings. Copy your unique connection URL, then click Open Claude integrations ↗ — Claude opens in a new tab on the Connectors page.
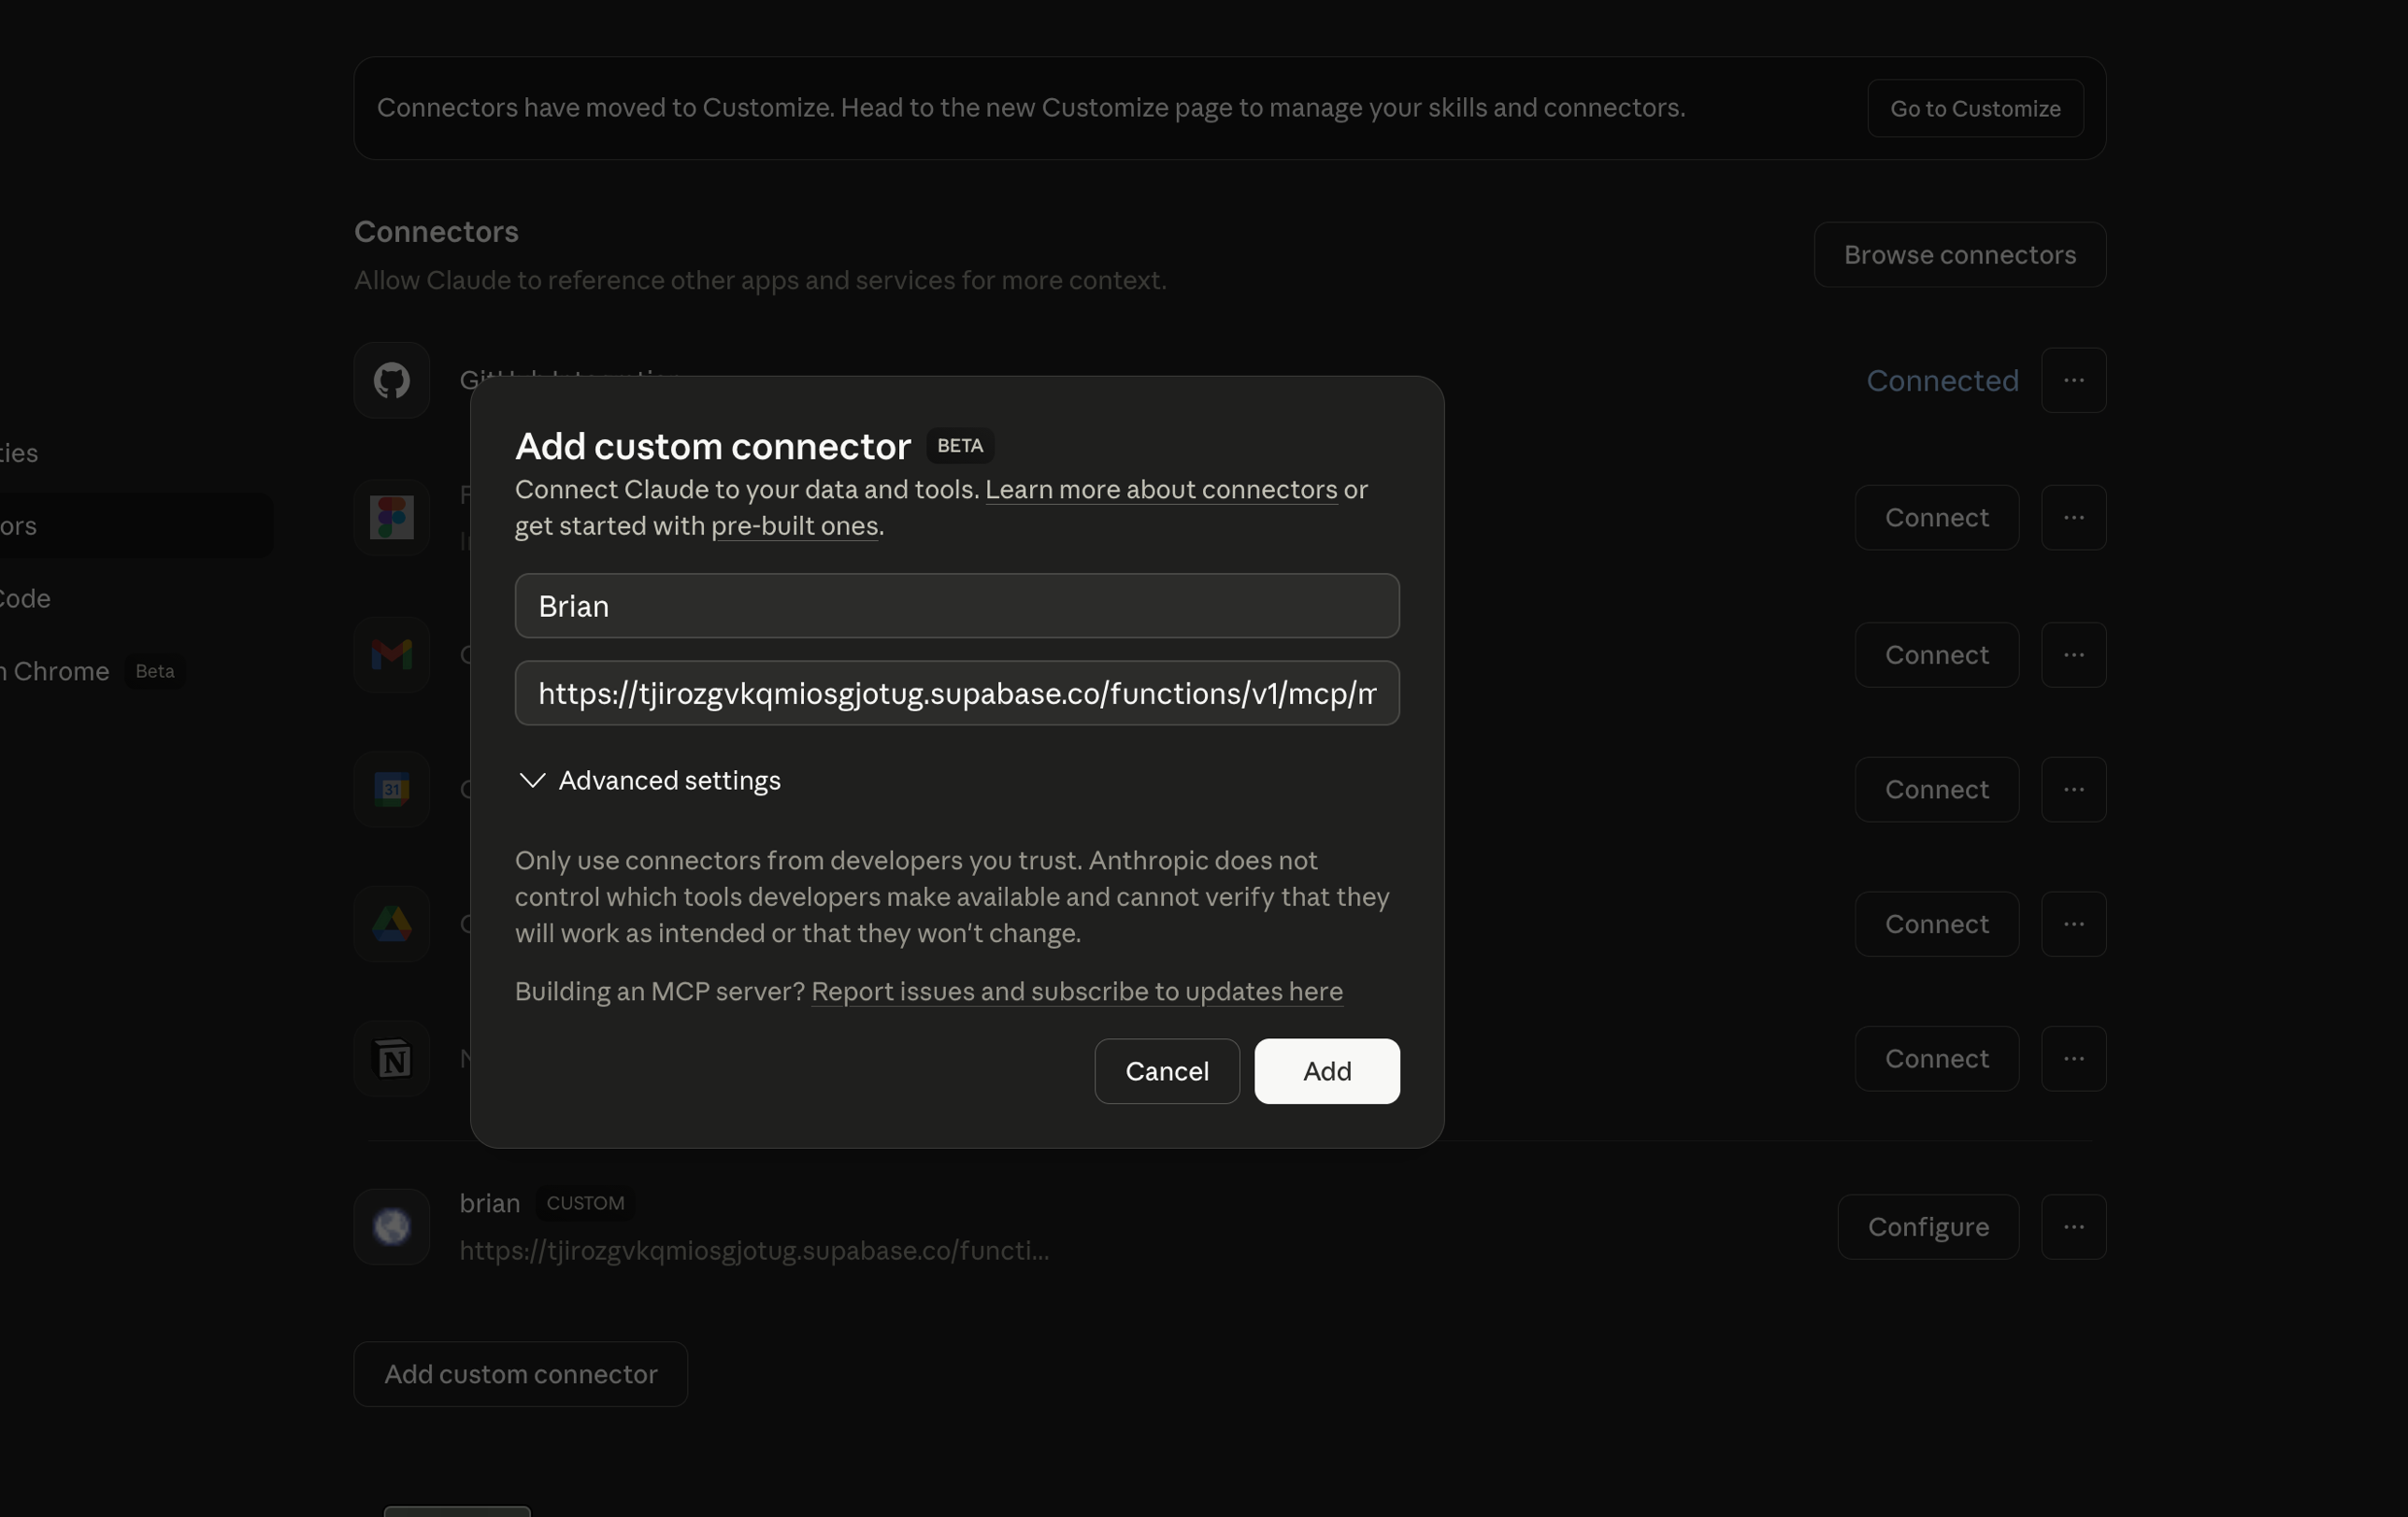
Add the custom connector
In Claude's Add custom connector dialog, name the connector Brian and paste the URL you copied from step 1 into the remote MCP server URL field. Hit Add.
Sign in to Brian
Brian now appears in Claude's connector list. Click Connect— Claude redirects you to Brian's sign-in page. Sign in with the email and password you used when you created your Brian account.
RETURN · MEMORY
Sign in to Brian
Pick up where you left off. Your memory is waiting.
Approve
After signing in, Brian shows the authorisation screen below. Click Approve.

The walkthrough back in Brian Settings auto-ticks Connected to Claudeon Brian's next tool call.
Kick off onboarding
Back in Brian Settings, the After connecting block (previewed below) appears once you're connected. Hit Open in Claudeto drop into a new conversation with the prompt pre-filled, or copy the prompt and paste it manually. Brian guides the rest — your role, what you use Claude for, how you'd like things organised. About two minutes.